It’s a Wrap: 7 Creative Ways to Use Ribbon This Holiday Season, Courtesy of Angela Ligouri and Studio Carta
Our advice if you’re looking to be more sustainable this holiday season: wrap gifts with upcycled newsprint or paper bags, or Kraft paper, which is recyclable and biodegradable, then add beauty and creativity via one of these seven ribbon-based wrapping methods from The Ribbon Studio.
Photography by Dane Tashima, from The Ribbon Studio, by Angela Ligouri and Studio Carta.
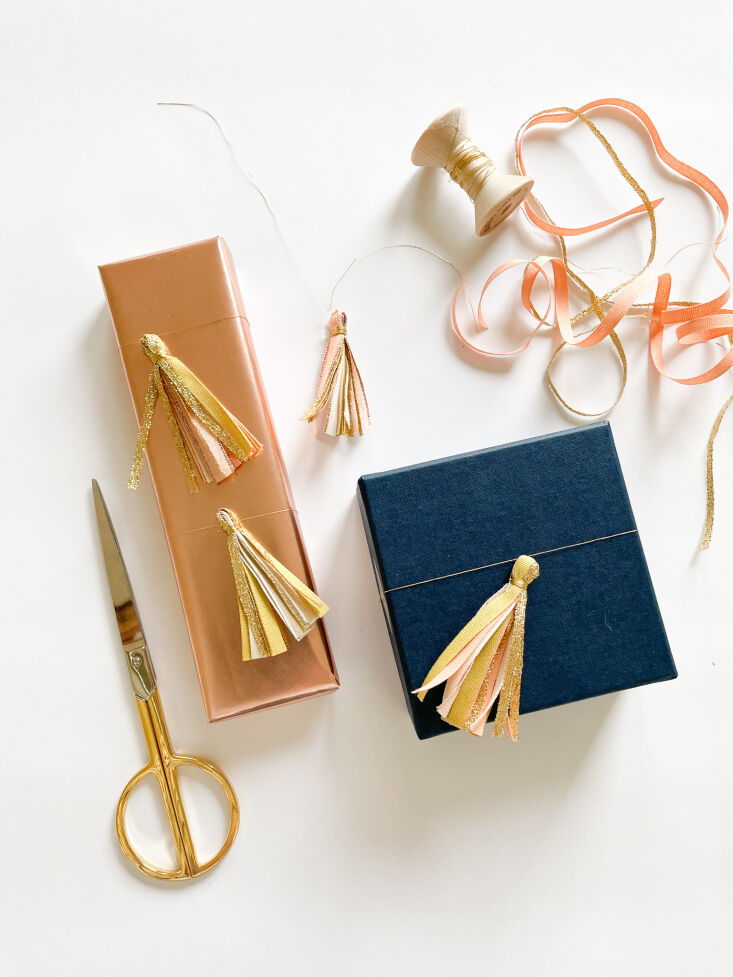
1. Ribbon Tassels
Above: Studio Carta ribbons are made from 100 percent cotton. To fabricate these tassels, cut 8 to 10 pieces of 1/4-inch ribbon; fold them in half; pinch together and wrap thread around several times near the top of the folds before tying with a double knot.
2. Tied Ribbons
Above: Got leftover too-short ribbon pieces? Simply use a square knot to tie them all together for a colorful and charming strand.
3. Ribbon Wreaths
Above: To create these gift toppers, cut out a 1-inch paper circle and glue on 2-inch lengths of ribbon to create a spiral shape.
4. Ribbon Tree
Above: How darling is this ribbon tree? Start by tying thin ribbon, thread, or twine down the middle of the package and once again at the bottom; these two strips act as anchors to keep the ribbon in place. Then weave ribbon in larger and larger “loops” as you make your way down.
5. Stacked Books
Above: A clever way to wrap several books. This layering method requires just tape and however many pieces of ribbon you desire.
6. Ribbon Ornament
Above: The book includes several DIY ribbon ornaments. This one is made from a 45-inch length of Studio Carta’s metallic ribbon, folded accordion-style into 14 loops, and sewn at the center to secure.
7. Layered Bows
Above: To replicate this topper, cut two pieces of ribbon, in two different colors, into three different lengths: 6 inches, 8 inches, and 10 inches. Press an adhesive dot in the center of each cut piece and loop one end to rest on top of half the adhesive dot, then repeat on the other side. Once all six bows are made, use adhesive dots to layer bows on top of one another, starting with the biggest on the bottom and criss-crossing the next bow, making sure to alternate colors.
See also:
* DIY: Accordion Book Keepsake with Angela Liguori
* DIY: A Trio of Gift Wrapping Master Classes from the Doyenne of Presentation
* Zero-Waste Wrapping: How To Wrap a Furoshiki Cloth, Step by Step | bit.ly/3XLoEJb
http://dlvr.it/TGYKXt


Comments
Post a Comment